Welding, grinding or misuse of welding products can produce sparks, fumes and debris which can cause harm. Do not breathe fumes. Do not operate without proper eye protection. Do not use around flammable materials.
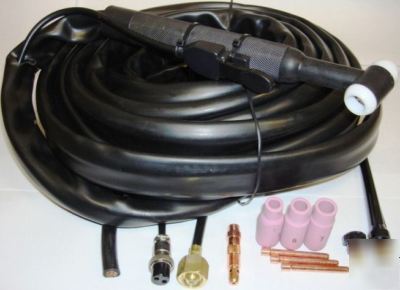
Tig Welding Torch w/ consumables
You get 1 air cooled 25ft tig torch w/ accessories
This is an original Riland Replacement Part for all of our Welding / Plasma Cutters. Rated 300amps.
The connectors work with our Tig200WSE or any other machine with independent dinse or female twist connectors with separate argon connector.
We offer other connectors, dinse 25 and dinse 50 for other machines. We also offer the argon quick connector kits to convert any such machine to use this or any universal torch.
1. Start and sustain an arc.
2. Create and move a weld puddle.
3. Add filler metal (push gently) into the puddle while moving the weld puddle along the weld joint path.
4. End the arc and leave the torch over the weld puddle to protect it until the puddle cools / gas flow stops.
How do I prepare my weld joint?
Cleaning both the weld joint area and the filler metal is an important preparation. Remove all oil, grease, dirt, paint, etc. The presence of contaminants may result in arc instability, contaminated welds or more problems.
Clamping may be required if the work piece cannot be supported during welding.
Make short 1/4 in. long tack welds along the work pieces to hold them together. Start by placing them at corners, bends or long lengths to avoid parts from moving and to stop separation while heating.
How do I position my torch for different types of joints?
When welding a butt joint, center the weld pool on the edges. When finishing, decrease the amperage to aid in filling the crater.
TIG torch position for butt weld
For a lap weld, form the weld pool so that the edge of the overlapping piece and the flat surface of the second piece flow together. Since the edge will melt faster, dip the filler rod next to the edge and make sure you are using enough filler metal to complete the joint.
TIG torch position for welding lap joint
When welding a T-joint, the edge and the flat surface are to be joined together, and the edge will melt faster. Angle the torch to direct more heat to the flat surface and extend the electrode beyond the cup to hold a shorter arc. Deposit the filler rod where the edge is melting.
TIG torch position for welding a T-joint
For a corner joint, both edges of the adjoining pieces should be melted and the weld pool should be kept on the joint centerline. A convex bead is necessary for this joint, so a sufficient amount of filler metal is needed.
TIG torch position for welding corner joint
What can I do to improve arc starting?
* Use the smallest diameter tungsten possible for the amperage you are using. Match the tungsten electrode size with the collet size.
* Purchase the highest quality tungsten available - ask your distributor for Miller-branded tungsten.
* Use a premium quality torch and work leads.
* Keep the torch and work leads as short as possible and move the power source as close as possible to the work.
* Make sure the Stick electrode holder is detached from the machine before TIG welding.
* Check and tighten all connections.
* Keep the torch cable from contacting any grounded metal.
* Use 100% argon shielding gas.
* Always use a push technique with the TIG torch.
* When welding a fillet, the leg of the weld should be equal to the thickness of the parts welded.
The free listing tool. List your items fast and easy and manage your active items.